Make Your Own Tongue and Groove Hardwood Floor Panels
Creating Your Own Hardwood Floors
Tongue and Groove Joint: 3 Techniques to Create Your Hardwood Floor Panels
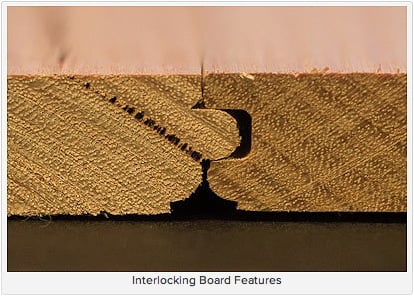
The tongue and groove joint has proved itself over centuries to be very simple, clean and strong. Popular uses for this joint are in the creation of doors, panels, and table tops. Another function for this joint is seen in hardwood floors. Unlike the other examples given, hardwood flooring is created solely with tongue and grooves linking one panel to the other. Because the joints run the length of the panel and are linked to one another, hardwood flooring is simple to assemble and remains very strong and sturdy over the years.
There is nothing better to bring warmth to a home than hardwood flooring. Hardwood floors fit easily in most, if not all types of homes and décor. Not only does it enhance and bring elegance to a room, but it is also timeless. Hardwood floors are durable, add value to your home, create an environment where dust does not collect over time, and there is an endless choice of woods to use.
There are a few options in the market when covering your floor with hardwoods. All things considered, there is no better way to cover a floor than to do it by yourself. From hand selecting the lumber, to air drying it, to milling and installing, the benefits are not just the feeling of accomplishment but saving money as well. Having a company cover a floor can seem like another mortgage. It is a very labor-intensive and tedious task, but as a wood worker, how can one hire someone else to do the work?
3 Techniques for Cutting Tongue and Groove Joints for Your Floor Panels
There are many different techniques in cutting tongue and groove joints. Depending on one’s shop tools, and the quantity of boards there are different recommendations as to which technique is best. Most of your decision making as to which technique to use depends on two variables: your shop tools and the quantity of boards needed to mill.
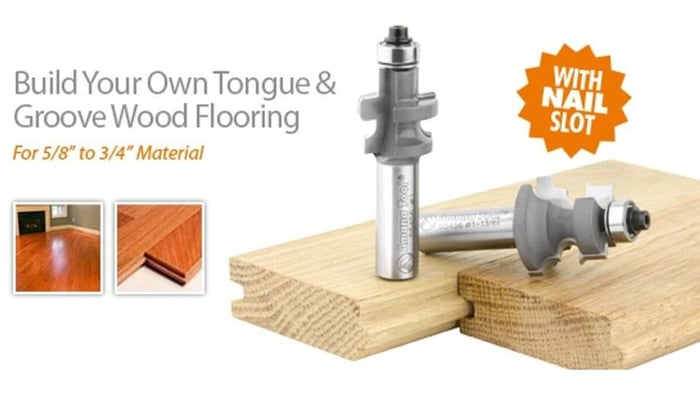
Tongue-and-groove joints are commonly made on a table saw. But with the right bits, the joints can be made just as easily and more efficiently on a router table or a shaper.
With these three possibilities deciding which method to take would depend first on your tools.
Table Saw:
A table saw is very powerful, and when cutting numerous boards can prove to be reliable in the long run.
The advantage to a table saw is that your cut will be completely clean and sharp, giving your joint a nice fit.
The major disadvantage in using a table saw is that your boards need to be cut using multiple passes. Additionally, both the tongue and groove need to be cut at different times.
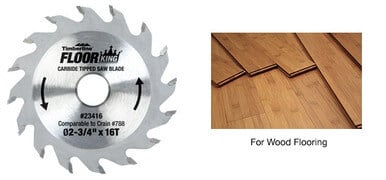
Our specialty toe-kick & jamb undercut saw blades are compatible with Crain® Toe-Kick & Undercut Saws, & Roberts® Jamb/Undercut Saws.
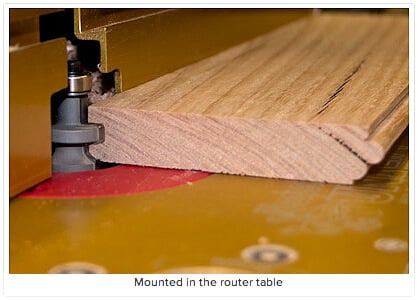
Router Table:
Another option is to use your router table. An option which gives less power than the table saw, yet the need to pass your boards through multiple times is alleviated. With the right flooring router bits and a few test passes with minor adjustments, one can create numerous identical tongue and groove joints.
Of course the disadvantage to the router option is power. If one is milling a large quantity of boards for hardwood floors, a router will take a real beating and wear and tear on any tools is not recommended.
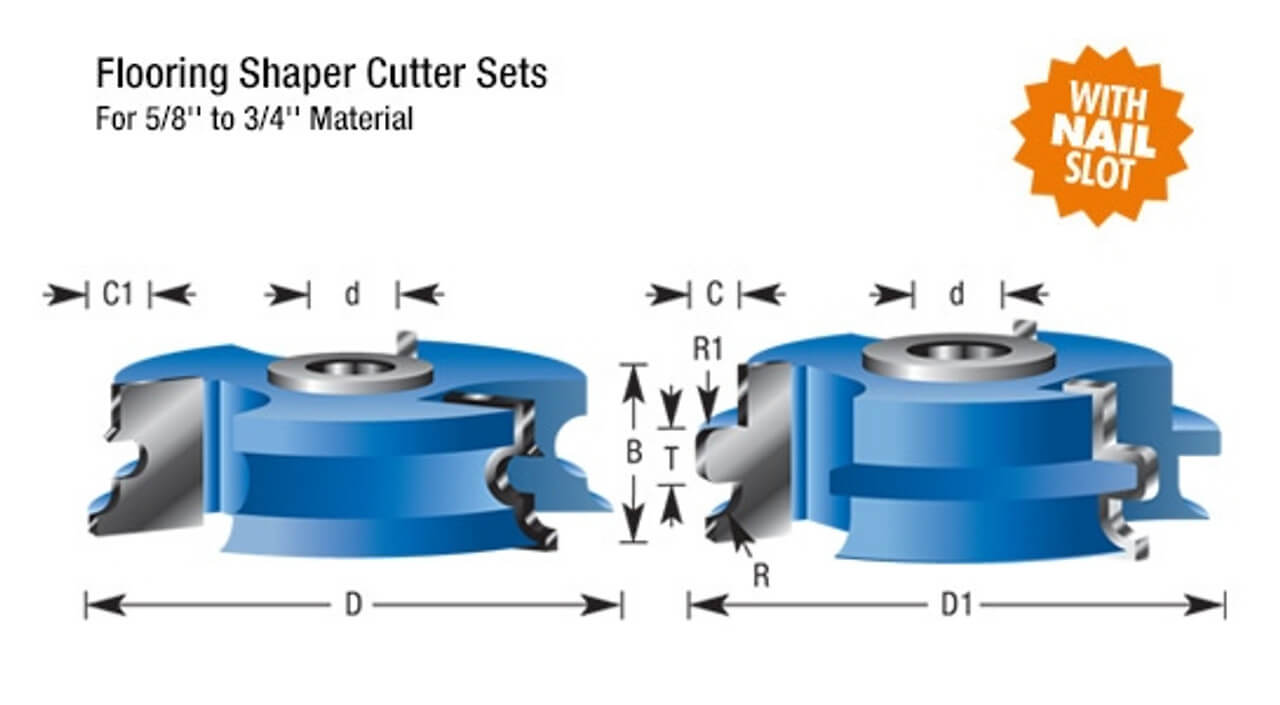
Shaper:
The third option is to use a shaper. A shaper, with a flooring shaper cutter set. A shaper enables a technique very similar to using a router table allowing you to make one pass completing the cut. The difference is that the shaper has the power needed to work all day.
Most woodworkers are restricted to what techniques we can use because of lack of resources, i.e. proper tools.
In an ideal world without these restrictions, the best method in cutting tongue and groove joints for floor panels is through the shaper.
Not only will the shaper be able to handle the quantity of boards, setting it up is simple. Both the tongue and groove is passed through just once and gives it a beautiful and strong factory-like fit. It takes all of the guess work out.
Replacing & Matching Old Floor Panels
After many years of having a hardwood floor, one can experience all types of damage. Whether it is light starched, gouges, water damage, boards lifting up…etc. Kids especially put a lot of wear and tear on hardwood floors.
There was one customer I had that lived in an old colonial home in central NJ; a historical and very well-kept beautiful home. The kitchen cabinets were made from old cherry with a gorgeous patina which showed that it lived a very long, yet delicate life. What wasn't so beautiful, and the reason I was there, were the oak floor boards, which were in shambles, found directly under the sink; obviously damaged through many years of water falling from the sink.
The client needed to have these boards replaced without losing the integrity of the old floor. We decided immediately that factory boards were out of the question. What we needed to do was to locate old growth oak, cut boards from it, create a tongue and groove joint to match the existing boards, install it and then age it to match.
I took a couple of good boards that surrounded the bad ones to my shop. I planed my new boards to thickness and with my shaper and shaper cutters, I was able to get a very close match to the old tongue and groove joints. Just a few minutes of hand work and they were as good as the original boards.
When installing them, I had to keep just one side of one board without a tongue for the board needed to drop in. With a strong adhesive on the bottom, it would sit secure for another century or two.
Now was the fun part. Not only did I need to match the patina, but also the color and finish. After playing around with color pigments, I was able to get something very close. After coloring it, I took out my keys and began to throw and scrape them a bit until I gained the amount of wear which had built up for so many years. Good as new (or old)!